Adding PostHog Analytics to a Flutter App
A Simple Developer's Guide
Jayachandran
App Developer (Z-II), Zemuria Inc.

Introduction: Why Your App Needs Analytics
You've probably just released an incredible Flutter app, and you have no clue how the users are actually using it. Do they utilize the features you labored for weeks to create? Do they bounce off at the exact same screen?
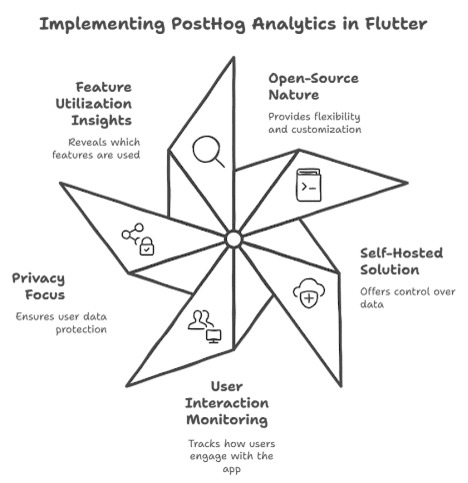
That's where PostHog Analytics comes in. Unlike most analytics solutions, PostHog is open-source, self-hosted, and provides you with complete visibility into how users interact—without compromising on privacy.

If you're seeking a Google Analytics alternative where you're in complete control of your data, PostHog is a great choice.

In this article, I am going to guide you through the process of implementing PostHog Analytics in a Flutter app so that you can monitor your users' activity, know how they behave, and make decisions.
Step 1: Creating Your PostHog Account
Let's begin with PostHog configuration before we dive into code:
- Head over to PostHog and sign up for free.
- Make a new project and assign it a suitable name (e.g., "My Flutter App Analytics").
- In the project areas, you will have an API Key—keep it safe, as we will be needing it to connect.
- PostHog is self-hosted too, and therefore if you'd rather have it in your stack, you can host it on Docker or Kubernetes.
Step 2: Adding PostHog to Your Flutter App
To include PostHog, we will use its official Flutter SDK.
1. Add the Dependency
Open your pubspec.yaml file and add:
dependencies:
  flutter:
    sdk: flutter
  posthog_flutter: ^4.10.0 # See the latest version on pub.dev
Then, run:
flutter pub get
This will download and install PostHog SDK for your Flutter application.
2. Integrate PostHog into Your App
Now, let's start PostHog when your app starts. Go back to your main.dart file and modify the
main() function:
import 'package:flutter/material.dart';
import 'package:posthog_flutter/posthog_flutter.dart';


void main() async {
  WidgetsFlutterBinding.ensureInitialized();
  final config = PostHogConfig("YOUR_API_KEY");
  config.debug = true; // Enable debugging during development
  config.captureApplicationLifecycleEvents = true; // Capture app lifecycle events like app open, close, etc.
  config.host = 'https://us.i.posthog.com'; // Change this if self-hosting
  await Posthog().setup(config);
}
Now, PostHog is set to record user data!
Step 3: Monitoring User Behavior in PostHog
The strength of the analytics is in event tracking. Let's start tracking some valuable interactions.
1. Button Click Monitoring
Assuming we need to record the event when users press the "Sign Up" button:
ElevatedButton(
    onPressed: () async {
        await Posthog().capture(
        eventName: 'signup_button_clicked',
        );
    },
    child: const Text('Submit'),
    ),
Helps track user interactions with buttons.
2. Capturing Users
To preserve individual users, assign each user a unique ID:
ElevatedButton(
    onPressed: () async {
        await Posthog()
            .identify(userId: emailController.text);
            // ... rest of your code
},
child: const Text('Login'),
),
Everything that they do from this point forward will be attributed to their profile.
3. Screen View Tracking
Log screen visits manually with:
@override
void initState() {
    super.initState();

    // Track screen view when the screen is initialized
    Posthog().capture(
    eventName: "screen_view",
    properties: {"screen_name": "HomeScreen"},
    );
}
This serves to determine where individuals spend most of their time.
Instead of manually calling `capture()` on each screen, you can also use a `NavigatorObserver` to automate tracking.
class PostHogObserver extends NavigatorObserver {
@override
void didPush(Route route, Route? previousRoute) {
    if (route.settings.name != null) {
    Posthog().capture(
        eventName: "screen_view",
        properties: {"screen_name": route.settings.name},
        );
    }
    }
}
// Add this observer to your MaterialApp:
MaterialApp(
    navigatorObservers: [PostHogObserver()],
);
Why This is Better?
- Eliminates manual tracking for each screen.
- Ensures consistency across the app.
- Reduces boilerplate code.
Step 4: Validating Data in PostHog
Once your integration is live, come on over to the PostHog dashboard and verify that the events are being tracked:
- You should now see the captured events in your PostHog activity tab.
- Use Funnels to see where users fall off the app path.
- Enable Heatmaps to observe how users interact.
- Create reports specific to your app's KPIs using Custom Dashboards.
This allows you to improve your app based on actual user behavior, maximize the user experience and enhance the conversion rates.
Final Thoughts: Making Data-Driven Development Easy
Merging PostHog Analytics with a Flutter app is a game-changer for product decisions and understanding user behavior. PostHog stands out from other analytics tools because it gives you complete ownership of your data if you host their cloud version or self-host. If you're serious about retention and growth, analytics isn't an amenity - it's a necessity.
Go ahead and ship PostHog into your Flutter app and start making data-informed decisions today!
Bonus: Troubleshooting Common Issues
❓ Events not showing up in PostHog?
✔ Make sure you've double-checked your API Key and that you're on the right PostHog host URL.
❓ App crashes when opening?
✔ Call Posthog().init() in main() and wrap it in WidgetsFlutterBinding.ensureInitialized().
